
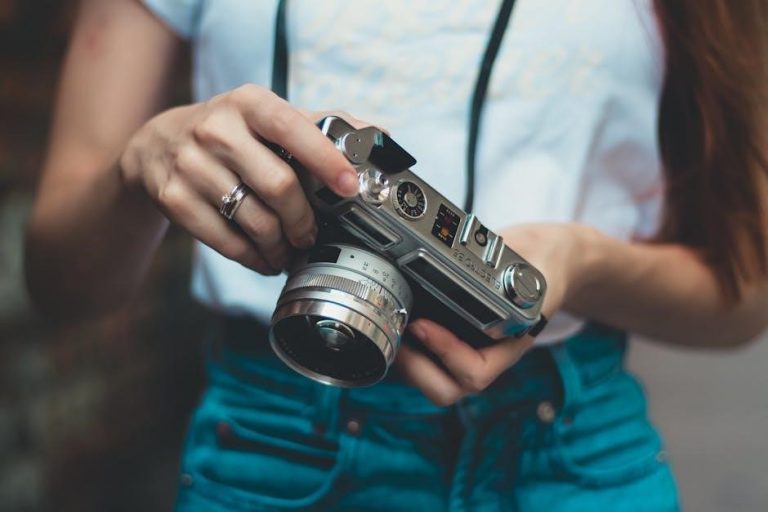
Manual Camera Cheat Sheet: A Comprehensive Guide
Unlock your camera’s full potential! This guide provides essential settings, exposure techniques, and compositional tips for photographers of all levels․
Explore cheat sheets for portraits, landscapes, and action, alongside troubleshooting advice for common issues․ Practice makes perfect – start experimenting today!
Discover downloadable 4×6 cards with useful combinations, and remember to view full cheat sheet images by clicking on screenshots․ This compilation is designed for quick reference․
Understanding the Exposure Triangle
Mastering exposure is fundamental to photography․ The exposure triangle consists of aperture, shutter speed, and ISO – three interconnected settings that determine image brightness․
Adjusting one setting necessitates compensating with others to maintain proper exposure․
Aperture controls depth of field, shutter speed captures motion, and ISO dictates light sensitivity․
Understanding their interplay allows for creative control over your photographs․
Practice manipulating these settings to observe their effects and achieve desired results․ This is the core of manual camera operation!
Aperture: Controlling Depth of Field
Aperture, measured in f-stops, governs the lens opening size․ Lower f-stop numbers (e․g․, f/1․8) create a shallow depth of field, blurring the background – ideal for portraits․
Higher f-stop numbers (e․g․, f/16) yield a large depth of field, keeping everything in focus – perfect for landscapes․
Aperture directly impacts light intake; wider openings let in more light․
Experiment with different f-stops to creatively control which parts of your image are sharp and which are blurred․
Shutter Speed: Capturing Motion
Shutter speed dictates how long the camera’s sensor is exposed to light․ Fast shutter speeds (e․g․, 1/1000s) freeze motion, excellent for sports or wildlife․
Slow shutter speeds (e․g․, 1/30s) create motion blur, conveying movement – useful for waterfalls or light trails․
Be mindful of camera shake with slower speeds; use a tripod for stability․
The “reciprocal rule” suggests using a shutter speed no slower than the focal length to avoid blur․
ISO: Sensitivity to Light
ISO determines your camera sensor’s sensitivity to light․ Lower ISOs (e․g․, 100) produce cleaner images with minimal noise, ideal for bright conditions․
Increasing ISO (e․g․, 3200) allows shooting in low light, but introduces digital noise or grain․
Base ISO offers optimal image quality․
Manage noise through post-processing techniques, but prioritize a lower ISO whenever possible for the sharpest results․
Key Camera Settings & Their Impact
Mastering camera settings unlocks creative control․ Shooting modes – Manual, Aperture Priority, Shutter Priority, and Program – offer varying levels of automation․
Metering modes (Evaluative, Center-Weighted, Spot) influence exposure calculation․
Focus modes (Single-Point, Continuous, Manual) determine how your camera acquires focus․
Understanding these settings and their interplay is crucial for achieving desired photographic outcomes․ Experiment to find what works best for your style!
Shooting Modes: Manual, Aperture Priority, Shutter Priority, Program
Choose the right mode for your vision! Manual (M) grants full control over aperture, shutter speed, and ISO․ Aperture Priority (Av or A) lets you set the aperture, while the camera adjusts shutter speed; Shutter Priority (Tv or S) prioritizes shutter speed, adjusting aperture accordingly․ Program (P) offers automated settings with some user override․ Each mode balances creative control and convenience, allowing photographers to adapt to diverse scenarios․
Metering Modes: Evaluative/Matrix, Center-Weighted, Spot
Master light measurement for accurate exposure! Evaluative/Matrix metering analyzes the entire scene for balanced exposure․ Center-Weighted prioritizes the center of the frame, ideal for portraits․ Spot metering measures light from a very small area, perfect for challenging lighting or specific subjects․ Understanding these modes allows you to override the camera’s assessment and achieve desired results, ensuring properly exposed images in varied conditions․
Focus Modes: Single-Point AF, Continuous AF, Manual Focus
Achieve sharp images with the right focus mode! Single-Point AF locks focus on a selected point, best for static subjects․ Continuous AF tracks moving subjects, crucial for sports or wildlife․ Manual Focus gives you complete control, useful for precise adjustments or low-light situations․ Back button focus offers an alternative, though it may slow down capture speed for fast-action photography․ Experiment to find what suits your shooting style!
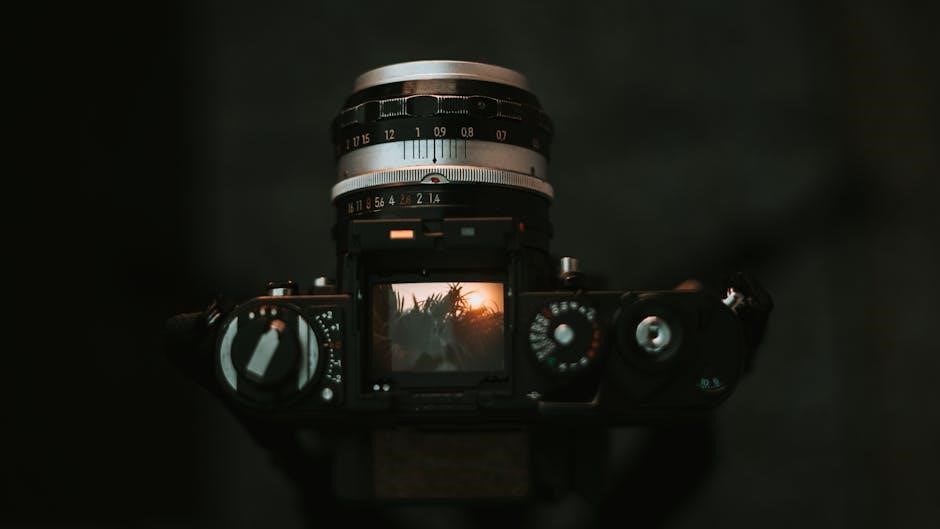
Aperture Deep Dive
Master depth of field with aperture control! F-stop numbers dictate lens opening – lower numbers (e․g․, f/1․8) create shallow depth of field, ideal for portraits․ Higher numbers (e․g․, f/16) yield greater depth, perfect for landscapes․ Aperture directly impacts creative control, blurring backgrounds or keeping everything sharp․ Understanding these effects is key to achieving your desired aesthetic․ Experiment with different settings to see the impact on your images!
F-Stop Numbers and Their Effects
F-stop numbers represent the size of the lens aperture․ Lower f-numbers (like f/1․4, f/2․8) signify wider openings, letting in more light and creating a shallow depth of field – ideal for isolating subjects․ Conversely, higher f-numbers (f/8, f/16) mean smaller openings, less light, and greater depth of field, keeping more of the scene in focus․ Each stop doubles or halves the amount of light entering the camera, impacting exposure․
Depth of Field and Creative Control

Depth of field (DoF) is the area in your image that appears sharp․ A shallow DoF, achieved with wide apertures (low f-numbers), blurs the background, drawing attention to your subject – perfect for portraits․ A large DoF, using narrow apertures (high f-numbers), keeps everything sharp, suitable for landscapes․ Manipulating DoF is a powerful creative tool, influencing how viewers perceive your images and guiding their focus within the scene․
Aperture for Portraits vs․ Landscapes
For portraits, prioritize a shallow depth of field․ Use wider apertures like f/1․8 or f/2․8 to blur the background, isolating your subject and creating a pleasing bokeh effect․ Landscapes demand a large depth of field․ Employ narrower apertures, such as f/8 to f/16, ensuring sharpness from foreground to background․ Consider your artistic vision; a slightly softer landscape can evoke mood, while sharp portraits emphasize detail and clarity․
Shutter Speed Explained
Shutter speed dictates how long the camera’s sensor is exposed to light․ Fast shutter speeds (e․g․, 1/250s, 1/1000s) freeze motion, ideal for sports or wildlife․ Slower shutter speeds (e․g․, 1/30s, 1/4s) create motion blur, conveying movement or a sense of speed․ Be mindful of camera shake; use a tripod with slower speeds․ The reciprocal rule suggests using a shutter speed at least equal to the reciprocal of your focal length to avoid blur․
Freezing Action vs․ Motion Blur
To freeze action, prioritize fast shutter speeds – 1/500s or faster․ This is crucial for capturing sharp images of moving subjects like athletes or birds in flight․ Conversely, motion blur is achieved with slower shutter speeds (1/30s or slower), intentionally blurring movement to convey speed or a dynamic feel․ Experiment with panning techniques, moving the camera with the subject, to maintain sharpness while blurring the background․
Shutter Speed and Camera Shake
Camera shake occurs when your camera moves during exposure, resulting in blurry images․ Slower shutter speeds are more susceptible to this․ To combat this, utilize a tripod for stability, especially in low light․ Alternatively, employ the reciprocal rule: your shutter speed should be at least 1/focal length (e․g․, 50mm lens needs 1/50s or faster)․ Image stabilization features in lenses or camera bodies can also help minimize blur, allowing for slightly slower handheld shooting․
Understanding Reciprocal Rule
The reciprocal rule is a guideline for handheld shooting, minimizing blur from camera shake․ It suggests setting your shutter speed to at least the inverse of your focal length․ For example, with a 50mm lens, use a shutter speed of 1/50th of a second or faster․ With a 200mm lens, aim for 1/200th of a second․ This isn’t a strict law, but a helpful starting point; factors like image stabilization and your steadiness influence optimal settings․
ISO Settings and Image Noise

ISO determines your camera’s sensitivity to light․ Lower ISOs (like 100) produce cleaner images with optimal quality, ideal for bright conditions․ Increasing ISO (e․g․, 800, 1600, or higher) brightens images in low light, but introduces digital noise – graininess that degrades image quality․
Finding the balance is key․ Manage noise through post-processing techniques, but prioritize the lowest possible ISO for the best results․
Base ISO and Optimal Image Quality
Your camera’s base ISO (typically 100) represents its lowest sensitivity setting․ Shooting at base ISO delivers the cleanest, most detailed images with the widest dynamic range․ This is because minimal amplification is applied to the sensor’s signal, reducing the chance of introducing digital noise․ Prioritize using base ISO whenever lighting conditions allow, ensuring the highest possible image quality and preserving subtle details․
Increasing ISO in Low Light Situations
When ambient light is limited, increasing ISO becomes necessary to achieve a proper exposure․ However, raising ISO amplifies the signal and noise․ Start by incrementally increasing ISO – from 100 to 200, then 400, and so on – until you reach a usable shutter speed and aperture․ Be mindful of the trade-off between brightness and image quality; higher ISOs introduce more noticeable grain․
Managing Noise in Post-Processing
Even with careful ISO management, some noise may be present in low-light images․ Post-processing software like Adobe Lightroom or Capture One offers noise reduction tools․ Apply these selectively, as aggressive noise reduction can soften details․ Start with luminance noise reduction, then address color noise․
Subtle adjustments are key! Aim to reduce noise without sacrificing image sharpness or texture․ Experiment with different settings to find the optimal balance for each photograph․
Focusing Techniques
Mastering focus is crucial for sharp images․ Back Button Focus separates focusing from the shutter button, allowing for continuous focus tracking while recomposing․ However, it can slow down shooting speed, potentially impacting sports photography․ Focus Peaking visually highlights in-focus areas during manual focusing, aiding precision․
Focus Tracking locks onto moving subjects, maintaining sharpness as they move․ Choose the appropriate technique based on your subject and shooting style․
Back Button Focus: Pros and Cons
Back Button Focus (BBF) decouples focusing from the shutter release, assigning focus to a button on the camera’s back․ Pros: Continuous focus tracking while recomposing, independent control of focus and shooting․ Cons: Can slow down reaction time, especially for fast-moving subjects, requiring practice to master․
It’s less ideal for sports where immediate capture speed is paramount, but excellent for portraits and landscapes where precise control is key․
Focus Peaking for Manual Focus
Focus Peaking is a helpful tool for achieving sharp manual focus․ Your camera highlights in-focus areas with color (often red, white, or yellow), making critical sharpness visually apparent․ It’s invaluable when using lenses without autofocus or when autofocus struggles in low light․
Adjust the peaking sensitivity to suit your needs․ While incredibly useful, remember peaking isn’t foolproof; always confirm sharpness via live view zoom․
Focus Tracking for Moving Subjects
Continuous AF (AF-C) is essential for capturing sharp images of moving subjects․ This mode continuously adjusts focus as the subject’s distance changes․ Utilize a wide area AF mode or select a focus point group to help the camera lock onto and track the subject effectively․
Experiment with different tracking sensitivity settings to optimize performance based on the subject’s speed and direction․ Back button focus can enhance control during tracking․
Exposure Compensation
Exposure compensation overrides the camera’s automatic metering to brighten or darken images․ Use it when the camera is fooled by challenging lighting, like bright snow or dark scenes․ Positive values (+1, +2, +3) brighten, while negative values (-1, -2, -3) darken․
Histograms are vital tools for evaluating exposure․ A histogram skewed to the left indicates underexposure, while a skew to the right suggests overexposure․ Adjust compensation until the histogram is balanced․
Understanding Over and Underexposure
Overexposure occurs when too much light reaches the sensor, resulting in washed-out highlights and lost detail․ Underexposure happens when insufficient light reaches the sensor, creating dark shadows and a lack of detail․ Both negatively impact image quality․

Recognize these issues by reviewing your camera’s histogram․ Adjust exposure compensation or camera settings (aperture, shutter speed, ISO) to achieve a balanced exposure, preserving detail in both highlights and shadows․
Using Exposure Compensation Effectively
Exposure compensation overrides the camera’s metering system, allowing manual brightness adjustments․ Use it when the camera’s automatic settings don’t deliver the desired result – for example, in bright snow scenes (reduce exposure) or dark subjects (increase exposure)․
Adjust in small increments (+/- 1/3 or 2/3 stop) and review the histogram to ensure proper exposure․ Practice using exposure compensation to master challenging lighting conditions and achieve consistently well-exposed images․
Histograms and Exposure Evaluation
Histograms visually represent the tonal distribution in your image – from dark shadows to bright highlights․ A histogram skewed to the left indicates underexposure, while a skew to the right suggests overexposure․
Ideally, aim for a balanced histogram with tones spread across the range, avoiding clipping (where data is lost in the shadows or highlights)․ Use the histogram to fine-tune exposure compensation and ensure accurate image representation․
White Balance Mastery
Achieve accurate colors! Auto White Balance (AWB) is convenient, but often inaccurate․ Explore custom settings and presets (daylight, cloudy, tungsten, etc․) for specific conditions․ Adjusting white balance corrects color casts, ensuring natural-looking images․
If shooting in RAW, white balance can be easily adjusted in post-processing without quality loss․ Mastering white balance ensures your photos reflect the scene’s true colors, enhancing visual impact and realism․
Auto White Balance vs․ Custom Settings
Convenience versus control! Auto White Balance (AWB) simplifies shooting, but struggles with mixed or unusual lighting․ Custom settings offer precision, allowing you to define “white” for accurate color rendition․ Presets like daylight, cloudy, or tungsten provide quick adjustments․
While AWB is suitable for general photography, custom settings are crucial for consistent results in challenging conditions․ Mastering this distinction elevates your image quality and creative control․
White Balance Presets for Different Conditions
Quick solutions for accurate color! Utilize presets for common scenarios: Daylight for sunny conditions, Cloudy to warm up cool tones, Shade for even warmer results, Tungsten to neutralize orange indoor lights, and Fluorescent to correct green casts․
Experiment with these presets to achieve desired aesthetics․ Remember, they’re starting points – fine-tune for optimal accuracy․ Understanding how each preset affects color is key to consistent, professional-looking images․
Adjusting White Balance in Post-Processing
Refine colors after the shot! Software like Adobe Lightroom or Capture One allows precise white balance adjustments․ Use the eyedropper tool to click on a neutral gray area in your image for automatic correction․ Alternatively, manually adjust the temperature (blue/yellow) and tint (green/magenta) sliders․
Post-processing offers flexibility, but shooting with accurate white balance minimizes editing․ Save time and maintain image quality by mastering both in-camera and post-processing techniques․
Compositional Guidelines
Elevate your images beyond technical correctness! Employ the Rule of Thirds, placing key elements along imaginary gridlines for balanced visuals․ Utilize Leading Lines to draw the viewer’s eye into the scene, creating depth and interest․
Master Framing with natural elements, and embrace Negative Space to highlight your subject․ These guidelines aren’t rules, but tools to enhance storytelling and create compelling photographs․ Experiment and develop your unique style!
Rule of Thirds
A cornerstone of visual balance! Imagine dividing your frame into nine equal parts using two horizontal and two vertical lines․ Position key elements along these lines, or at their intersections – these are your power points․
This technique avoids centering subjects, creating more dynamic and engaging compositions․ It’s a simple yet effective method for improving the visual appeal of your photographs, guiding the viewer’s eye naturally through the scene․ Experiment with off-center placement!
Leading Lines
Direct the viewer’s gaze! Utilize lines within your scene – roads, fences, rivers, or even shadows – to draw the eye towards your subject․ These lines create depth and perspective, adding a sense of movement and guiding the viewer on a visual journey․
Strong leading lines enhance the impact of your composition, making it more compelling and immersive․ Experiment with different angles and types of lines to achieve varied effects․ They are a powerful compositional tool!
Framing and Negative Space
Isolate your subject and create balance! Framing uses elements within the scene – arches, branches, doorways – to draw attention to the main subject․ This technique adds depth and context, enhancing visual interest․
Negative space, the empty area surrounding your subject, provides breathing room and emphasizes its importance․ It prevents clutter and allows the viewer’s eye to rest․ Combining framing and negative space results in a harmonious and impactful composition․
Cheat Sheets for Common Scenarios
Quick reference for optimal settings! These cheat sheets offer starting points for various photographic situations․ Portrait Photography: Use a wide aperture (f/1․8-f/2․8) for shallow depth of field, ISO 100-400, and shutter speed of 1/125s or faster․
Landscape Photography: Employ a narrow aperture (f/8-f/16) for maximum depth of field, low ISO (100-200), and a shutter speed determined by light conditions․ Sports/Action: Utilize a fast shutter speed (1/500s or faster), higher ISO as needed, and continuous autofocus․
Portrait Photography Settings
Achieve stunning portraits with these guidelines! Prioritize a wide aperture, typically between f/1․8 and f/2․8, to create a beautifully blurred background – known as bokeh – isolating your subject․ Maintain an ISO between 100 and 400 for optimal image quality, increasing only in low light․
Employ a shutter speed of 1/125s or faster to prevent motion blur․ Consider back-button focus for precise control․ Utilize evaluative metering and single-point AF for accurate exposure and sharp focus on the eyes․
Landscape Photography Settings
Capture breathtaking landscapes with these recommended settings! Opt for a narrow aperture, such as f/8 to f/16, to maximize depth of field, ensuring sharpness from foreground to background․ Keep your ISO low – ideally 100 – to minimize noise and preserve detail․
Use a slower shutter speed, like 1/60s or slower, often requiring a tripod for stability․ Employ evaluative metering and single-point AF, focusing on a key element within the scene․ Experiment with exposure compensation for balanced tones․
Sports/Action Photography Settings
Freeze the action with these dynamic settings! Prioritize a fast shutter speed – 1/500s or faster – to eliminate motion blur․ Utilize a wider aperture, like f/2․8 or f/4, to allow ample light and create a shallow depth of field, isolating your subject․
Increase your ISO as needed, balancing brightness with acceptable noise levels․ Employ continuous AF and evaluative metering․ Consider back-button focus for enhanced control, though it may slow capture speed initially․
Troubleshooting Common Issues
Don’t let technical hiccups ruin your shots! Blurry images often stem from slow shutter speeds or incorrect focus; increase shutter speed or refine your focusing technique․ Dark images require adjusting exposure – widen the aperture, slow the shutter speed, or raise the ISO․
Noisy images typically indicate high ISO settings․ Lower the ISO if possible, and utilize noise reduction in post-processing․ Review your histogram to evaluate exposure accurately and prevent common pitfalls․
Blurry Images: Causes and Solutions
Sharpness is key! Blurry photos frequently result from camera shake, especially with slower shutter speeds․ Employ the reciprocal rule – your shutter speed should generally be at least 1/focal length․ Incorrect focus is another culprit; ensure accurate focus point selection and consider back-button focus․
Motion blur can be intentional or unwanted․ If unintentional, increase shutter speed․ If the subject is moving quickly, continuous autofocus is crucial․ Finally, stabilize your camera with a tripod for optimal sharpness․
Dark Images: Adjusting Exposure
Brighten your shots! Underexposed images lack detail in shadows․ In manual mode, increase aperture (lower f-stop number) to let in more light․ Alternatively, slow down your shutter speed, but beware of camera shake․ Raising the ISO increases sensitivity, but introduces noise․
Utilize exposure compensation to quickly brighten or darken images in Aperture Priority or Shutter Priority modes․ Review your histogram – a graph showing tonal distribution – to ensure proper exposure and avoid clipping shadows․
Noisy Images: Managing ISO and Noise Reduction
Minimize grain and artifacts! High ISO settings amplify signal, but also introduce noise․ Shoot at the lowest possible ISO for optimal image quality․ When low light is unavoidable, carefully balance ISO with aperture and shutter speed․

Employ in-camera noise reduction or utilize post-processing software like Adobe Lightroom or Photoshop to reduce noise․ Be mindful that excessive noise reduction can soften details․ Find a balance that preserves image clarity while minimizing unwanted grain․