
GE Gas Range Self Cleaning Instructions: A Comprehensive Guide
Navigating GE gas range self-cleaning involves understanding safety, preparation, and the cycle itself. From initial checks to post-cleaning procedures,
this guide details each step for optimal results and appliance longevity.
Understanding Your GE Gas Range
Before embarking on the self-cleaning journey, familiarize yourself with your specific GE gas range model. GE offers a diverse range of gas ranges, each potentially featuring slight variations in control panel layouts, self-cleaning cycle options, and safety features. Consult your owner’s manual – it’s the primary resource for model-specific instructions.
Generally, GE gas ranges utilize a high-temperature self-cleaning cycle to incinerate food residue within the oven cavity. This process transforms baked-on spills and splatters into a light ash that can be easily wiped away post-cycle. Understanding the oven’s capacity and the type of enamel coating (often porcelain) is crucial. Some models offer different self-cleaning durations – light, normal, and heavy – catering to varying levels of soiling. Knowing these options allows you to select the most appropriate cycle length, minimizing energy consumption and cycle time.
Furthermore, be aware of any specific warnings or recommendations outlined in your manual regarding the self-cleaning process, particularly concerning ventilation and potential odors.
Self-Cleaning Cycle Overview
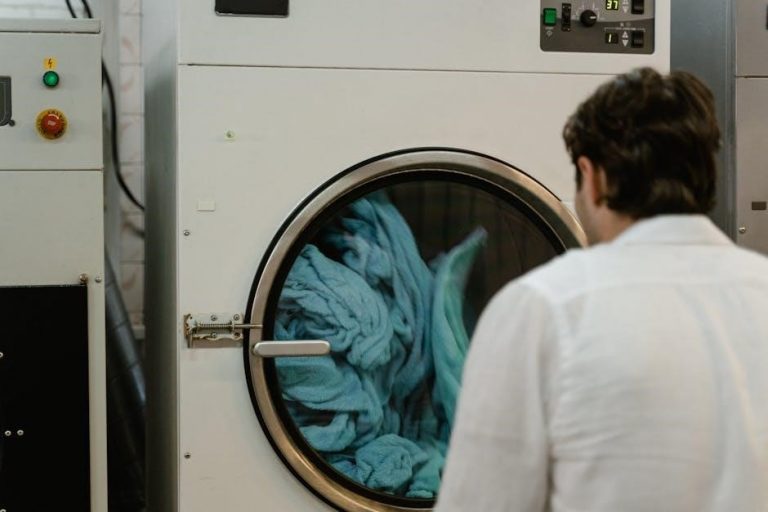
The self-cleaning cycle on a GE gas range is a high-heat process designed to eliminate oven buildup without manual scrubbing. Typically, the cycle heats the oven to temperatures exceeding 800°F (427°C), effectively carbonizing food residue into a powdery ash. This intense heat necessitates strict safety precautions, detailed elsewhere in this guide.

During the cycle, the oven door automatically locks for safety, remaining locked until the oven cools down sufficiently. The duration of the cycle varies depending on the selected cleaning level – light, medium, or heavy – and the model of your GE range. Expect the cycle to last anywhere from two to four hours.
It’s important to understand that the self-cleaning process isn’t instantaneous. Smoke and odors are common byproducts, and adequate ventilation is essential. The cycle concludes with a cooling period, during which the oven door remains locked. Once cooled, the ash can be easily wiped away with a damp cloth.
Before You Begin: Safety Precautions
Prior to initiating the self-cleaning cycle on your GE gas range, several crucial safety precautions must be observed. The high temperatures generated pose potential hazards if not addressed properly. First, ensure the kitchen is well-ventilated; open windows and use exhaust fans to dissipate fumes. Remove any large spills or excessive grease from the oven floor, as these can create excessive smoke.
Never attempt to open the oven door during the self-cleaning cycle – it’s automatically locked for your safety. Keep children and pets away from the oven during operation and cooling. Individuals with respiratory sensitivities should avoid the kitchen during the cycle due to potential smoke and odors.
Disconnect any aftermarket oven thermometers or temperature sensors. Ensure the cooktop is clear of any flammable materials. Finally, be aware that the exterior of the oven will become very hot; avoid accidental contact. Following these precautions will ensure a safe and effective self-cleaning experience.
Preparing Your Range for Self-Cleaning
Thorough preparation is key to a successful self-cleaning cycle for your GE gas range. Begin by removing all cookware, bakeware, and any loose debris from within the oven cavity. Wipe up any significant spills or large food particles with a damp cloth – excessive residue can cause smoke. Ensure the oven door seals are clean and intact to maintain proper temperature control during the cycle.
Check for any aluminum foil, oven liners, or temperature probes left inside, as these can be damaged by the high heat. A quick visual inspection of the oven floor and walls will help identify any forgotten items. Consider a light manual cleaning of heavily soiled areas before starting the cycle to minimize smoke production.
Finally, ensure the kitchen is adequately ventilated by opening windows and turning on the exhaust fan. Proper preparation minimizes potential issues and maximizes the effectiveness of the self-cleaning process.
Removing Oven Racks and Accessories
Before initiating the self-cleaning cycle on your GE gas range, it’s crucial to remove all oven racks and accessories. The intense heat generated during self-cleaning can discolor or warp these components, potentially damaging their finish. Carefully slide out each rack, taking care not to scratch the oven interior.
Alongside the racks, remove any broiler pans, baking stones, temperature probes, or other items stored within the oven. These accessories are not designed to withstand the high temperatures of the self-cleaning cycle and could be a fire hazard. Store the removed racks and accessories in a safe, dry location away from the oven.
Consult your GE range’s user manual for specific instructions regarding removable oven bottom panels or other unique features. Failing to remove all items can lead to damage and compromise the effectiveness of the cleaning process.

Locking the Control Panel

A vital safety feature of GE gas ranges during the self-cleaning cycle is the control panel lock. This function prevents accidental operation of the oven during the high-temperature process, safeguarding against burns or unintended cycle interruptions. Before starting the self-clean, locate the “Lock” or “Control Lock” key on your range’s control panel – its exact location varies by model.
Typically, you’ll need to press and hold this key for a few seconds until a lock indicator illuminates on the display. This confirms the panel is securely locked. The locked panel disables all buttons and dials, ensuring the cycle runs uninterrupted.

Refer to your GE range’s user manual for precise locking instructions specific to your model. Some ranges may require a combination of button presses. Always verify the lock is engaged before initiating the self-cleaning cycle for optimal safety and performance.
Starting the Self-Cleaning Cycle
Initiating the self-cleaning cycle on your GE gas range is straightforward, but requires careful attention to preparation. Ensure the oven door is fully closed and locked – a crucial safety step. Navigate to the “Self Clean” option on your range’s control panel. Depending on your model, you might select a cleaning duration (light, normal, or heavy) or simply press “Start.”
The range will automatically lock the control panel once the cycle begins, preventing interruption. A high temperature will be reached, so avoid opening the door during operation. Some models offer a delayed start option, allowing you to schedule cleaning for a convenient time.
Always consult your owner’s manual for specific instructions tailored to your GE range model. Understanding the cycle’s parameters and safety features ensures a thorough and secure cleaning process. Remember to maintain adequate ventilation during the cycle.
Cycle Duration and Temperature
The self-cleaning cycle on a GE gas range typically operates at extremely high temperatures, reaching around 880-900°F (470-482°C). This intense heat effectively burns off food residue and spills within the oven. Cycle duration varies based on the selected cleaning level and soil buildup.
A “light” clean might take approximately 2-3 hours, suitable for minimal residue. A “normal” cycle generally runs for 3-4 hours, addressing moderate cleaning needs. For heavily soiled ovens, a “heavy” clean can extend to 4-5 hours or even longer. The range automatically manages the temperature and duration based on your selection.
It’s crucial not to interrupt the cycle, as fluctuating temperatures can damage the oven’s components. The high heat is essential for complete cleaning, but also necessitates proper ventilation and safety precautions. Refer to your model’s manual for precise temperature and timing details.
Monitoring the Self-Cleaning Process
While the self-cleaning cycle is automated, occasional monitoring is advisable. Observe for any unusual smells or excessive smoke, indicating a potential issue. The oven door will automatically lock at the start of the cycle and remain locked until it cools sufficiently – do not attempt to force it open.
Most GE gas ranges display the cycle’s progress on the control panel. You’ll typically see indicators showing the remaining time or the current phase of the cleaning process. Be aware that the oven exterior will become very hot during operation; keep children and pets away.
Avoid directly looking into the oven window during the cycle, as the intense brightness can be harmful. If you notice anything concerning, like flames or a burning odor beyond the expected smell, immediately turn off the range and allow it to cool completely before investigating.
Ventilation During Self-Cleaning
Adequate ventilation is crucial during the self-cleaning cycle of your GE gas range. The high temperatures involved release fumes and odors, which can be irritating or even harmful if concentrated. Open windows in the kitchen and surrounding areas to create cross-ventilation.
If your range is located near a kitchen exhaust fan, activate it during the cleaning process to help remove airborne particles and smells. Consider using additional fans to circulate air and expedite the dissipation of odors. Individuals with respiratory sensitivities, such as asthma, should avoid being in the immediate vicinity during the cycle.
While the self-cleaning process is generally safe, proper ventilation minimizes potential discomfort and ensures a healthier environment. Ensure pets, particularly birds, are removed from the area, as they are especially sensitive to fumes.
What to Expect: Smoke and Odors
During the self-cleaning cycle, some smoke and odors are normal, especially during the initial phase. This is a result of food residue being reduced to ash at extremely high temperatures. The amount of smoke will vary depending on how much food buildup is present in the oven.
Expect a burning smell, which is typically harmless, but can be strong. A small amount of white smoke is common; however, if you observe thick, dark smoke, immediately stop the cycle and consult the troubleshooting section of your owner’s manual. Ensure proper ventilation, as previously described, to minimize odor and smoke concentration.
It’s important to remember that the self-cleaning cycle is designed to eliminate baked-on food, and this process inherently produces some byproducts. Don’t be alarmed by these occurrences, but always prioritize safety and ventilation.
After the Self-Cleaning Cycle Completes
Once the self-cleaning cycle finishes, allow the oven to cool completely before attempting to open the door. The oven will remain locked until it reaches a safe temperature, which can take several hours. Do not force the door open, as this could cause damage or injury.
After the cooling period and unlocking the control panel, you’ll find a fine, powdery ash residue remaining in the oven. This is normal and easily cleaned up. Use a damp cloth or sponge to wipe away the ash, avoiding abrasive cleaners that could scratch the oven’s interior.
Inspect the oven thoroughly for any remaining stubborn spots. A mild dish soap solution can be used for these areas. Remember to rinse well and dry completely before using the oven again. Proper post-cycle cleanup ensures optimal performance and prevents lingering odors.
Cooling Down Period
The cooling down period is a critical phase following the self-cleaning cycle. The oven reaches extremely high temperatures during cleaning, and allowing it to cool completely is paramount for safety and preventing damage. Do not attempt to open the oven door until it unlocks automatically – this indicates a safe temperature has been reached.
This cooling process can take a significant amount of time, often several hours, depending on the cycle duration and your oven model. Patience is key; forcing the door open could result in burns or damage to the locking mechanism and oven components.
During this time, avoid placing anything on or near the oven. Ensure children and pets are kept away from the appliance. The exterior surfaces will also be hot, so exercise caution. A complete cool-down ensures a safe transition to post-cleaning tasks.
Unlocking the Control Panel
Once the cooling down period is complete, the control panel will automatically unlock. This is a safety feature designed to prevent accidental operation while the oven is still hot; You’ll typically notice a click or a visual indicator on the display signifying the unlock. However, some models may require a brief press of the ‘Clear/Off’ or ‘Start’ button to confirm the unlock.
If the control panel doesn’t unlock after a reasonable cooling time, consult your GE range’s user manual. There might be a specific procedure for manual unlocking, though this is uncommon. Avoid attempting to force the buttons, as this could damage the electronic controls.
Confirm the panel is fully unlocked before attempting to use any oven functions. A locked panel will prevent you from setting temperatures or starting cooking cycles. Successful unlocking signals the range is ready for normal operation.
Cleaning Up Remaining Ash
After the self-cleaning cycle and complete cooling, a fine layer of ash will remain in the oven cavity. This is a normal byproduct of the high-temperature cleaning process. Allow the oven to cool completely before attempting to remove the ash – never do this while the oven is still warm.
Use a damp cloth or sponge to wipe away the ash. Avoid abrasive cleaners or scouring pads, as these can damage the oven’s interior surface. For stubborn ash residue, a paste of baking soda and water can be gently applied and then wiped clean. Ensure all traces of baking soda are removed afterward.
Vacuuming the oven floor with a hose attachment can also effectively remove ash. Dispose of the vacuumed ash carefully. Remember to check the oven vents for any blockage caused by ash and clear them if necessary.
Troubleshooting Common Issues
Occasionally, the self-cleaning cycle may encounter issues. One frequent problem is the cycle failing to start; ensure the door is fully latched, the control panel is locked correctly, and no error codes are displayed. Check your GE range’s manual for specific error code meanings.
Excessive smoke during cleaning can occur, especially with heavily soiled ovens. Ensure proper ventilation by opening windows and using the range hood. A small amount of smoke is normal, but significant smoke warrants pausing the cycle and investigating potential food spills.
If error codes appear during the self-cleaning process, consult the appliance’s manual for troubleshooting steps. Common codes relate to temperature sensor failures or door lock malfunctions. If the issue persists, contacting GE’s customer support or a qualified appliance repair technician is recommended.
Self-Clean Cycle Won’t Start
If your GE gas range’s self-clean cycle refuses to initiate, several factors could be at play. First, verify the oven door is securely latched; the range won’t start if it detects an open or improperly closed door. Next, confirm the control panel is fully locked – a safety feature preventing accidental activation.

Check for any displayed error codes on the control panel. These codes provide specific clues about the problem, often indicating a sensor malfunction or a door lock issue. Consult your range’s user manual to decipher the code’s meaning and recommended solution.
Ensure no large spills or excessive debris remain inside the oven. While self-cleaning handles typical residue, significant buildup can sometimes interfere with the cycle’s start. Finally, confirm the oven hasn’t recently undergone a cleaning cycle; a cool-down period may be required before restarting.
Excessive Smoke During Cleaning
Experiencing excessive smoke during your GE gas range’s self-clean cycle is common, but significant smoke warrants attention. A small amount of smoke is normal as the high temperatures incinerate food residue. However, heavy, dark smoke indicates a larger buildup of grease or food particles than usual.
Before initiating the cycle, thoroughly remove any large pieces of food debris. Ensure the oven is relatively empty. Proper preparation minimizes smoke production. If smoke persists, pause the cycle and allow the oven to cool. Then, manually clean any remaining heavy residue before attempting another self-clean.
Adequate ventilation is crucial. Open windows and use the kitchen exhaust fan to dissipate smoke and odors. Avoid prolonged exposure to the smoke, as it can irritate the respiratory system. If the problem continues despite these measures, consult a qualified appliance repair technician.

Error Codes During Self-Cleaning
Encountering error codes during the self-cleaning cycle on your GE gas range signals a potential issue requiring attention. These codes are the appliance’s way of communicating a problem, preventing damage, and ensuring safety. Refer to your range’s user manual for a comprehensive list of error codes and their corresponding meanings.
Common error codes might indicate a door lock malfunction, a temperature sensor failure, or an issue with the igniter. Often, simply turning the range off and then back on can reset the system and clear the error. However, persistent error codes necessitate further investigation.
Do not attempt to bypass or ignore error codes. This could lead to more significant damage or create a safety hazard. If the error persists after a reset, document the code and contact GE’s customer support or a qualified appliance repair technician for assistance. Providing the error code will expedite the diagnostic process.
Maintaining Your GE Gas Range
Consistent maintenance extends the life and performance of your GE gas range, complementing the self-cleaning feature. While self-cleaning tackles baked-on messes, regular upkeep prevents buildup and ensures optimal functionality. Implement a routine cleaning schedule to maintain a pristine cooking environment.
Regular manual cleaning involves wiping down the cooktop after each use, removing spills promptly, and cleaning the oven interior periodically with a mild detergent and water. Avoid abrasive cleaners, as they can damage surfaces. Pay close attention to burner caps and grates, ensuring they are free of debris.
The oven door requires regular cleaning to remove grease and food splatters. A glass cleaner specifically designed for appliances is recommended. Preventative measures, such as using oven liners and wiping up spills immediately, minimize the need for intensive cleaning. Consistent care keeps your GE gas range operating efficiently and safely.
Regular Manual Cleaning
Supplementing the self-cleaning cycle with regular manual cleaning is crucial for maintaining a hygienic and efficient GE gas range. Daily or after-each-use wipe-downs prevent grease and food particles from building up, reducing the intensity needed for self-cleaning and extending the range’s lifespan.
Focus on the cooktop, immediately addressing spills to avoid stubborn residue. Use a soft cloth and mild dish soap; avoid abrasive cleaners that can scratch the surface. Burner grates and caps should be removed and soaked in warm, soapy water, then scrubbed clean. The oven interior benefits from monthly wipe-downs, even between self-cleaning cycles.
A paste of baking soda and water can tackle tougher stains. Remember to rinse thoroughly to remove any residue. Consistent manual cleaning minimizes odors, improves cooking performance, and keeps your GE gas range looking its best, lessening reliance on the self-clean function.
Cleaning the Oven Door
The GE gas range oven door requires specific cleaning attention, as it accumulates grease and splatters during cooking. Begin by wiping down the door’s exterior with a soft cloth dampened with warm, soapy water. For stubborn, baked-on residue, a paste of baking soda and water can be applied, left to sit for 15-20 minutes, and then gently scrubbed.
If your model has a removable door, consult your owner’s manual for instructions on safe removal and reinstallation. Cleaning the glass interior can be achieved with a glass cleaner, avoiding abrasive materials. Pay close attention to the edges and seals of the door, ensuring they are free from debris to maintain a proper seal during cooking and self-cleaning.
Regular cleaning prevents buildup and ensures clear visibility into the oven. Avoid harsh chemicals that could damage the door’s finish. A clean oven door contributes to both the appliance’s appearance and its efficient operation.
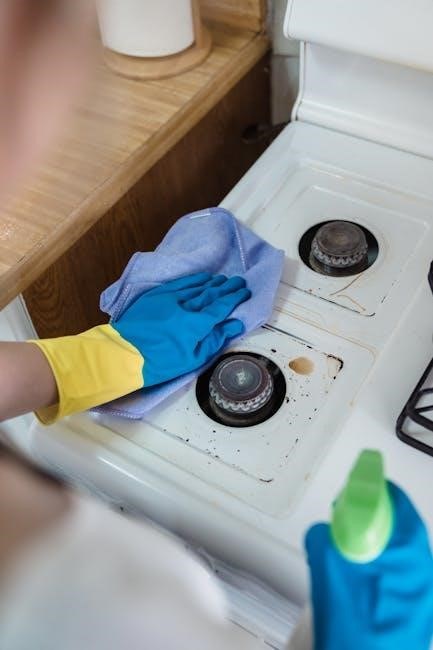
Cleaning the Cooktop
Maintaining a clean GE gas range cooktop is crucial for both performance and safety. After each use, allow the cooktop to cool completely before cleaning. Remove any loose debris with a soft brush or cloth. For everyday spills, warm, soapy water is usually sufficient; apply with a non-abrasive sponge and rinse thoroughly.
Burner grates should be removed and washed separately, either by hand or in the dishwasher (check your owner’s manual for dishwasher-safe confirmation). Stubborn, baked-on food can be loosened with a cooktop cleaning solution specifically designed for gas ranges. Avoid abrasive cleaners or scouring pads, as these can scratch the surface.
Pay attention to the burner ports, ensuring they are clear of obstructions for even flame distribution. A small wire or pin can be used to gently clear any blockages. Regular cooktop cleaning prevents buildup, maintains efficient heating, and extends the life of your GE gas range;
Preventative Measures for Future Cleaning
Proactive steps significantly reduce the effort required for future GE gas range cleaning. Immediately address spills as they occur, preventing them from baking onto the cooktop or oven interior. Utilize oven liners to catch drips and splatters during baking, simplifying cleanup considerably.
When using the self-cleaning cycle, avoid excessive food buildup by wiping down the oven’s interior beforehand. Regularly cleaning the burner grates and drip pans prevents grease and carbon from accumulating. Consider using a splatter screen while frying to minimize grease dispersal.
For the cooktop, a quick wipe-down after each use maintains a pristine surface. Employing gentle cleaning solutions consistently avoids the need for harsh chemicals later. These preventative habits contribute to a cleaner range and less frequent, intensive cleaning sessions, preserving your appliance’s condition.
Understanding GE Range Models & Variations
GE gas range self-cleaning features vary across different models and series. While most modern GE ranges include a self-clean cycle, the duration, temperature, and specific functionalities can differ. Some models offer steam clean options as a lighter-duty alternative to the high-heat self-clean.
Higher-end GE ranges may incorporate features like a self-clean convection mode for more even heating during the cleaning process. Digital ranges often provide more precise control over cycle settings and offer error code diagnostics. Older models might have simpler, manually controlled self-clean cycles.
Always consult your specific GE range’s user manual to understand its unique self-cleaning capabilities and limitations. Variations exist in control panel layouts and locking mechanisms. Knowing your model ensures safe and effective use of the self-clean function, maximizing its benefits and preventing potential issues.
Resources and Support
For comprehensive assistance with your GE gas range’s self-cleaning function, several resources are readily available. The official GE Appliances website (geappliances.com) provides detailed user manuals, FAQs, and troubleshooting guides specific to your model number. You can locate your manual by entering the model number on their support page.
GE’s customer service team offers direct support via phone and online chat. Their contact information is available on the website. YouTube hosts numerous videos demonstrating the self-cleaning process on various GE ranges, offering visual guidance. Online appliance repair forums and communities can provide peer-to-peer support and solutions to common issues.
Additionally, GE offers authorized service providers for in-home repairs if you encounter persistent problems. Remember to have your model and serial number handy when seeking support to ensure accurate assistance. Utilizing these resources will help you maintain your range effectively.