
Honeywell Pro Series Installation Manual: A Comprehensive Plan
This manual details the installation of your Honeywell Pro Series thermostat․ Crucially, always turn off power at the breaker box before beginning․ The package includes the thermostat and a UWP mounting system (ISU) for simplified setup․
Contractor Mode is accessed by holding the Honeywell Home logo for five seconds, enabling advanced configuration options․ System testing for heating and cooling is essential post-installation․
Safety Precautions
Prioritizing safety is paramount during the Honeywell Pro Series thermostat installation process․ Always disconnect power to your HVAC system at the breaker box or switch before commencing any work․ Failure to do so presents a significant risk of electrical shock or damage to the equipment․
Exercise caution when handling wiring․ If you are uncomfortable working with electrical connections, immediately consult a qualified HVAC technician․ Incorrect wiring can lead to system malfunction, fire hazards, or void the thermostat’s warranty․
Ensure the installation area is dry and free from obstructions․ Use appropriate safety glasses to protect your eyes from debris during wall mounting or wiring procedures․ When using tools, adhere to the manufacturer’s safety guidelines․
Be mindful of the thermostat’s operating temperature range and avoid exposing it to extreme heat or cold․ Keep the thermostat away from water or other liquids․ If you detect any unusual smells or sounds during or after installation, immediately turn off the power and seek professional assistance․
Proper grounding is essential for safe operation․ Always follow local electrical codes and regulations during installation․
Package Contents Verification
Upon receiving your Honeywell Pro Series thermostat package, carefully verify the contents against the included packing list․ This ensures all necessary components are present before beginning the installation process, preventing delays and frustration․
The standard package should include the T6 Pro Wi-Fi Thermostat unit itself․ Critically, confirm the presence of the UWP Mounting System, specifically the Installer Set Up (ISU) options, which are vital for a secure and streamlined installation․
Check for the junction box adapter, essential for compatibility with existing wall setups․ Verify the inclusion of mounting screws and wall anchors appropriate for your wall type․ The package must also contain a detailed installation manual – this guide!
Inspect for any signs of damage to the thermostat unit, wiring connectors, or mounting hardware․ If any items are missing or appear damaged, immediately contact Honeywell customer support or your point of purchase for a replacement․
Retain the original packaging and all documentation for potential warranty claims or future reference․ A complete and undamaged package ensures a smooth and successful installation experience․
Tools Required for Installation
Before commencing the Honeywell Pro Series thermostat installation, gather the necessary tools to ensure a smooth and efficient process․ Having everything readily available will minimize interruptions and potential complications․
A Phillips head screwdriver is essential for removing the existing thermostat and securing the mounting hardware․ A flathead screwdriver may also be required for certain terminal connections․ A small level is crucial for ensuring the thermostat is mounted straight, contributing to a professional appearance and accurate operation․
Wire strippers are necessary for preparing the HVAC wiring for connection to the thermostat base plate․ A voltage tester (non-contact) is highly recommended to verify that power is completely off at the thermostat wires before handling them – safety first!
Pencil for marking screw locations and wiring configurations․ Depending on your wall material, you may need a drill with appropriate drill bits for installing wall anchors․ Consider having a pair of needle-nose pliers for manipulating wires in tight spaces․
Finally, a smartphone or tablet with internet access is required for the Wi-Fi connection and Honeywell Home app setup․ Proper preparation with these tools will significantly simplify the installation process․
Turning Off Power at the Breaker Box
Prior to any wiring or installation work on your Honeywell Pro Series thermostat, absolutely and unequivocally turn off the power supply to your HVAC system at the breaker box․ This is the most critical safety precaution to prevent electrical shock and potential damage to the thermostat or your HVAC equipment․
Locate your electrical panel, typically found in a basement, garage, or utility room․ Identify the circuit breaker that controls your furnace and/or air conditioner․ It’s crucial to confirm you’ve identified the correct breaker – consult your home’s electrical diagram if needed․
Switch the breaker to the “OFF” position․ Double-check that the breaker is fully disengaged․ To be absolutely certain, use a non-contact voltage tester at the thermostat wires themselves to verify that no power is present․
Do not proceed with the installation if you detect any voltage․ If you are unsure about any part of this process, consult a qualified electrician․ Safety is paramount․ A momentary lapse in caution can have serious consequences․
Once power is confirmed off, you can safely begin removing the existing thermostat and preparing for the installation of your new Honeywell Pro Series model․
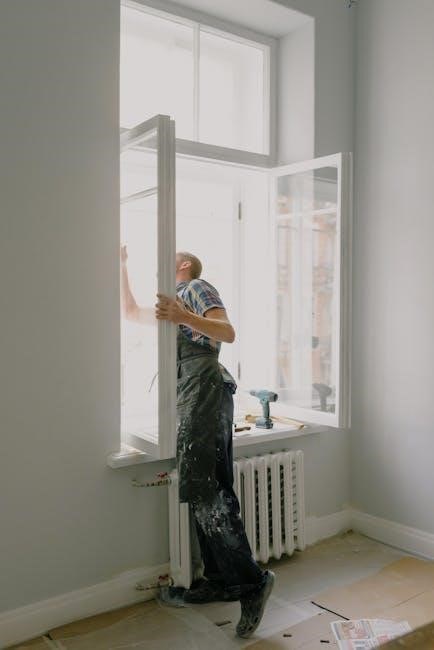
Removing Existing Thermostat
Before installing your Honeywell Pro Series thermostat, carefully remove your existing thermostat from the wall․ Begin by gently removing the thermostat cover․ This usually snaps off or is held in place by small clips․ Take note of the wiring configuration – it’s highly recommended to take a clear photograph of the existing wiring before disconnecting anything․ This photo will serve as a valuable reference during the installation of your new thermostat․
Once the cover is removed, you’ll see the wires connected to terminals․ Carefully disconnect each wire, labeling it as you go․ Use the provided wire labels or create your own system to identify each wire’s function (R, C, W, Y, G, etc․)․
Loosen the screws holding the existing thermostat base plate to the wall․ Gently pull the base plate away from the wall, revealing the wiring behind it․ Be cautious not to damage the wall or the wires․
Ensure all wires are disconnected and clearly labeled before proceeding․ Discard the old thermostat base plate, but retain the wires for connection to your new Honeywell Pro Series thermostat․
Identifying HVAC Wiring
Accurately identifying your HVAC wiring is crucial for a successful Honeywell Pro Series thermostat installation․ The most common wires you’ll encounter are designated by letters, each serving a specific function․ The R wire typically provides power to the thermostat (24V)․ The C wire is the common wire, completing the circuit and often required for consistent power․
The W wire controls the heating system, activating it when a call for heat is made․ The Y wire activates the cooling system, initiating the air conditioning․ The G wire controls the fan, turning it on and off independently or in conjunction with heating or cooling․
It’s vital to consult your HVAC system’s documentation to confirm the function of each wire, as wiring configurations can vary․ If you’re unsure, do not proceed – consult a qualified HVAC technician․ Incorrect wiring can damage your system or the thermostat․
Some systems may have additional wires for features like auxiliary heat or emergency heat․ Carefully compare your wiring to the Honeywell Pro Series thermostat wiring diagram to ensure proper connections․ Double-check all wire identifications before proceeding to the next step․
Understanding Terminal Designations (R, C, W, Y, G)
The Honeywell Pro Series thermostat utilizes specific terminal designations to ensure correct wiring and system operation․ Understanding these is paramount for a successful installation․ The ‘R’ terminal is the 24V power terminal, receiving voltage from the HVAC system’s transformer․ It’s often red, hence the ‘R’ designation, but color coding isn’t always consistent․
The ‘C’ terminal, or common wire, provides the return path for the 24V power, completing the circuit․ A stable ‘C’ wire connection is often essential for Wi-Fi connectivity and consistent thermostat performance․
The ‘W’ terminal activates the heating system․ When the thermostat calls for heat, it sends voltage through the ‘W’ wire to engage the furnace or heating unit․ The ‘Y’ terminal controls the cooling system, activating the air conditioner when a cooling demand is present․
Finally, the ‘G’ terminal controls the blower fan․ It energizes the fan to circulate air, either independently or in conjunction with heating or cooling․ Incorrectly connecting these wires can lead to system malfunction, so careful attention to detail is crucial․
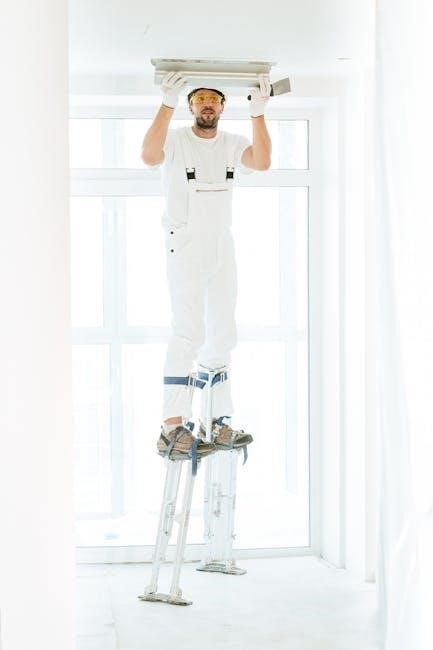
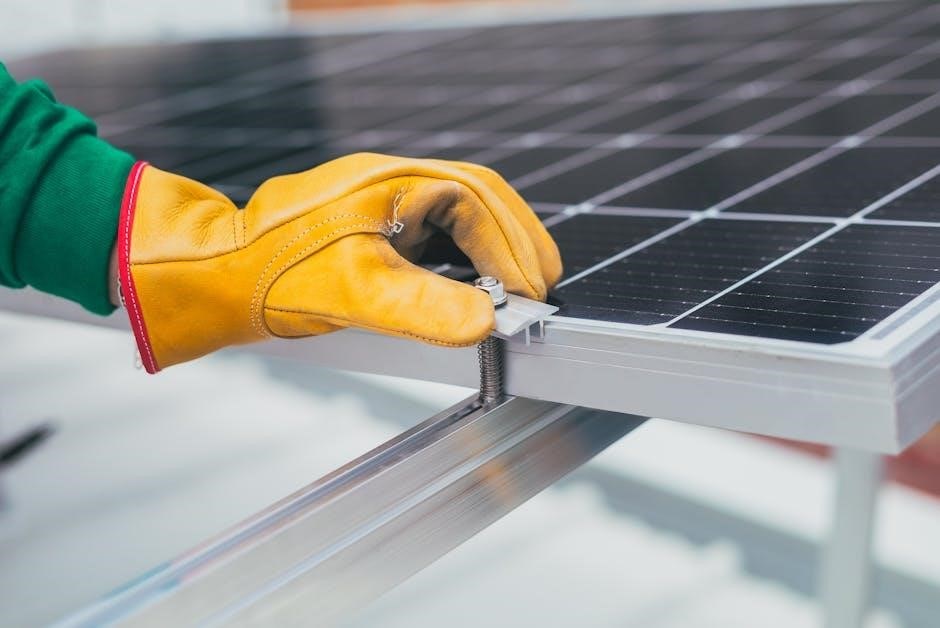
Mounting the Junction Box Adapter
Properly mounting the junction box adapter is a foundational step in the Honeywell Pro Series thermostat installation․ This adapter, often part of the UWP Mounting System (Installer Set Up ― ISU), provides a secure and level base for the thermostat․ Begin by ensuring the power to the HVAC system remains completely off at the breaker box․
Locate the existing thermostat’s wiring location․ The adapter can be mounted directly to the electrical box or to the wall using the provided screws․ Leveling the adapter is critical; use a level to ensure it’s perfectly horizontal before fully tightening the screws․ An unlevel adapter can cause alignment issues when attaching the thermostat itself․
If mounting to a wall without an existing box, use the provided anchors for secure attachment․ Ensure the screws are appropriate for the wall material․ The adapter should sit flush against the wall, providing a stable platform for the base plate; Double-check the stability before proceeding to the wiring stage․
The ISU options within the UWP system offer flexibility in mounting, accommodating various wall types and existing wiring configurations․
Wiring the Honeywell Pro Series Thermostat
Careful wiring is paramount for the correct operation of your Honeywell Pro Series thermostat․ Before commencing, verify the power remains off at the breaker box․ Identify the existing HVAC wiring, noting the color and terminal designations (R, C, W, Y, G – detailed in a separate section of this manual)․
Using the wiring diagram specific to your HVAC system and the thermostat, connect the wires to the corresponding terminals on the base plate․ Ensure each wire is securely inserted into the terminal; a loose connection can cause malfunctions․ The ‘C’ wire (common wire) is often crucial for consistent power and Wi-Fi connectivity․
If you encounter any uncertainty regarding wiring, consult a qualified HVAC technician․ Incorrect wiring can damage the thermostat or your HVAC system․ Take a photograph of the existing wiring before disconnecting anything – this serves as a valuable reference․
Double-check all connections against the wiring diagram before proceeding to attach the thermostat to the base plate․ Proper wiring ensures seamless communication between the thermostat and your heating/cooling system․
Connecting the Wires to the Base Plate
Securely connecting the wires to the base plate is a critical step in the Honeywell Pro Series thermostat installation․ After identifying each wire based on its terminal designation (R, C, W, Y, G), carefully insert each wire into its corresponding terminal on the base plate․ Ensure the wires are fully inserted and locked into place – a firm connection is essential for reliable operation․
The base plate terminals are designed to accept standard HVAC wiring․ Gently tug on each wire after insertion to confirm it’s securely held․ Avoid stripping the wires excessively, as this can lead to short circuits․ If a wire is damaged, carefully trim the end to expose fresh conductor․
Double-check your wiring against the diagram before proceeding․ Incorrect connections can cause system malfunctions or damage․ The ‘C’ wire, providing constant power, is particularly important for Wi-Fi functionality․
Take your time and ensure each connection is solid․ A well-connected base plate is the foundation for a properly functioning thermostat and a comfortable home environment․
Attaching the Thermostat to the Base Plate
Once the wires are securely connected to the base plate, carefully align the Honeywell Pro Series thermostat with the base․ The thermostat is designed to snap firmly into place, ensuring a snug and stable fit․ Gently press the thermostat onto the base plate, applying even pressure across the entire surface․
You should hear a distinct click as the thermostat locks into position․ If it doesn’t click, double-check the alignment and apply slightly more pressure․ Avoid forcing it, as this could damage the thermostat or the base plate․ Ensure the thermostat sits flush against the wall, without any gaps or wobbling․
A secure attachment is vital for maintaining a clean aesthetic and preventing accidental disconnections․ Once attached, gently test the thermostat’s stability by lightly pressing on different areas․ If it feels loose, re-seat it until it clicks firmly into place․
This step completes the physical installation of the thermostat․ You are now ready to proceed with powering on the HVAC system and configuring the thermostat settings․
Installing Batteries (If Applicable)
Certain Honeywell Pro Series thermostat models require battery installation, even with a common (C) wire connected․ This ensures continued operation during power outages and maintains settings memory․ Refer to your specific model’s documentation to confirm if batteries are necessary․
Typically, the battery compartment is located on the back of the thermostat, accessible after it’s attached to the base plate․ Locate the battery compartment cover and gently slide or lift it open․ Insert the required number of batteries – usually two AA alkaline batteries – following the polarity markings (+ and -) inside the compartment․
Ensure the batteries are fresh and correctly installed for optimal performance․ Incorrectly installed batteries can cause inaccurate readings or thermostat malfunction․ Once the batteries are in place, close the battery compartment cover securely․
Even with a C-wire, batteries act as a backup power source․ Regularly check the battery level within the thermostat’s settings menu, and replace them when prompted to avoid interruptions in service․ Proper battery maintenance contributes to the longevity and reliability of your Honeywell Pro Series thermostat․
Powering On the HVAC System
After completing the wiring and ensuring all connections are secure, it’s time to restore power to your HVAC system․ Carefully return to the breaker box and switch the breaker that controls your furnace and air conditioner back to the “ON” position․ Do not proceed if you are unsure which breaker controls your HVAC system․
Once power is restored, the Honeywell Pro Series thermostat should power on automatically․ The display screen will illuminate, and you may see the thermostat begin its initial startup sequence․ Allow a few moments for the system to initialize and establish communication with your HVAC equipment․
Observe the thermostat closely for any unusual behavior, such as error messages or flickering displays․ If you encounter any issues, immediately turn the power off at the breaker box again and re-examine your wiring connections․
If the thermostat powers on without issue, proceed to the initial setup process․ This typically involves selecting your system type (heating, cooling, or heat pump) and configuring basic settings․ Refer to the thermostat’s on-screen prompts or the accompanying manual for detailed instructions․

Initial Thermostat Setup
With the HVAC system powered on, the Honeywell Pro Series thermostat will guide you through the initial setup process․ This crucial step configures the thermostat to correctly operate your specific heating and cooling system․ The thermostat will likely prompt you to select your system type – options typically include forced air, heat pump, or radiant heating․
Carefully choose the option that accurately reflects your home’s HVAC configuration․ Incorrect selection can lead to improper operation and reduced efficiency․ You’ll also be asked to input information about your fuel source (gas, oil, or electric) and the number of stages for both heating and cooling․
Pay close attention to these prompts, as accurate information is vital for optimal performance․ The thermostat may also ask you to set your preferred temperature units (Fahrenheit or Celsius) and your time zone․
Once you’ve completed these initial settings, the thermostat will save your preferences and prepare for Wi-Fi connection․ Take your time and double-check all entries before proceeding to ensure a smooth and efficient setup experience․
Wi-Fi Connection Process
Connecting your Honeywell Pro Series thermostat to Wi-Fi unlocks remote control and advanced features through the Honeywell Home app․ To initiate the connection, navigate to the network settings on the thermostat’s display․ The thermostat will scan for available Wi-Fi networks in your area․
Select your home network from the list․ You’ll then be prompted to enter your Wi-Fi password using the thermostat’s touchscreen interface․ Ensure you enter the password correctly, as incorrect credentials will prevent connection․ The thermostat will attempt to connect to your network, displaying a progress indicator․
This process may take a few minutes․ Once connected, the thermostat will display a confirmation message and a Wi-Fi signal strength indicator․ If the connection fails, double-check your password and ensure your router is functioning correctly․
A stable Wi-Fi connection is essential for reliable remote access and automatic software updates․ After successful connection, proceed to download and set up the Honeywell Home app on your smartphone or tablet․
Honeywell Home App Download and Setup
The Honeywell Home app is your gateway to remotely controlling and monitoring your Pro Series thermostat․ Begin by downloading the app from the Apple App Store (iOS) or Google Play Store (Android)․ Search for “Honeywell Home” and install the official application․
Once installed, launch the app and create a new account or log in with an existing Honeywell Home account․ Follow the on-screen prompts to register your thermostat․ The app will guide you through the process of adding your device, typically requiring you to scan a QR code located on the thermostat or within the packaging․
Ensure your smartphone or tablet is connected to the same Wi-Fi network as your thermostat during the setup process․ The app will then prompt you to name your thermostat and assign it to a location within your home․
After successful registration, you’ll have full control over your thermostat’s settings, including temperature adjustments, scheduling, and access to energy usage reports․ Explore the app’s features to personalize your comfort and optimize energy efficiency․
Thermostat Registration
Registering your Honeywell Pro Series thermostat unlocks its full potential, enabling remote access and advanced features through the Honeywell Home app․ This process links your physical thermostat to your digital account, allowing for convenient control from anywhere with an internet connection․
Following the Wi-Fi connection, the Honeywell Home app will automatically prompt you to register your newly connected thermostat․ If not, navigate to the “Add Device” section within the app and follow the guided instructions․ You’ll likely be asked to scan the QR code found on the thermostat itself or on the packaging it came in;
During registration, you’ll be required to provide a unique serial number, typically located on the back of the thermostat or within the settings menu accessible on the device’s display․ Ensure accurate entry of this number for successful registration․
Once registered, you can name your thermostat for easy identification, assign it to a specific room or zone within your home, and begin customizing its settings to match your preferences․ Registration also grants access to firmware updates and customer support resources․
System Testing: Heating Mode
After completing the installation and initial setup, thoroughly testing the heating mode is crucial to verify proper functionality of your Honeywell Pro Series thermostat․ Begin by setting the thermostat to “Heat” mode and raising the desired temperature several degrees above the current room temperature․
Observe the HVAC system․ You should hear the furnace ignite and warm air begin circulating through the vents․ Listen for any unusual noises, such as rattling or banging, which could indicate a problem with the furnace itself․ Allow the system to run for at least 10-15 minutes to ensure consistent heating․

Verify that the thermostat display accurately reflects the current room temperature and that the heating system cycles on and off as expected, maintaining the set temperature․ If the system fails to ignite, or if the temperature fluctuates significantly, double-check the wiring connections and ensure the thermostat is correctly configured․
If issues persist, consult the troubleshooting section of this manual or contact a qualified HVAC technician․ Proper heating system operation is essential for comfort and energy efficiency․
System Testing: Cooling Mode
Following successful heating mode testing, it’s vital to verify the proper operation of the cooling system with your Honeywell Pro Series thermostat․ Set the thermostat to “Cool” mode and lower the desired temperature several degrees below the current room temperature․
Listen for the outdoor condenser unit to activate․ You should hear the fan start and the compressor engage․ Simultaneously, check that cool air is being distributed through the vents inside your home․ Pay attention to any unusual sounds emanating from the condenser unit, such as loud humming or clicking, which could signal a potential issue․
Allow the system to run for at least 10-15 minutes, observing whether the thermostat accurately displays the decreasing room temperature and if the cooling system cycles on and off to maintain the setpoint․ Confirm that the fan operates correctly in both “Auto” and “On” settings․
If the system doesn’t cool, or if you notice any irregularities, revisit the wiring connections and thermostat settings․ If problems continue, consult the troubleshooting guide or seek assistance from a qualified HVAC professional to ensure optimal cooling performance․
Contractor Mode Access
The Honeywell Pro Series thermostat features a dedicated “Contractor Mode” designed for professional installers and advanced users․ This mode unlocks access to specialized settings and diagnostic tools not typically available in standard user operation․ Accessing Contractor Mode is straightforward, but requires a specific sequence․
To enter Contractor Mode, locate the Honeywell Home logo on the thermostat’s display․ Press and hold this logo continuously for approximately five seconds․ The thermostat will then transition to a dedicated interface displaying advanced configuration options․
Within Contractor Mode, you can adjust parameters like cycle rates, temperature offsets, and system configurations․ It also provides access to detailed system diagnostics, allowing for precise troubleshooting and performance optimization․ Be cautious when modifying settings within Contractor Mode, as incorrect adjustments can impact system functionality․
Remember to exit Contractor Mode once adjustments are complete․ The method for exiting may vary slightly depending on the specific model, but typically involves navigating to a “Settings” menu and selecting “Exit Contractor Mode”․
Troubleshooting Common Installation Issues
During Honeywell Pro Series thermostat installation, several common issues may arise․ One frequent problem is a lack of power to the thermostat after installation․ Always double-check that the breaker supplying power to the HVAC system is fully switched off before beginning work, and then ensure it’s switched back on correctly after wiring․
Another common issue involves incorrect wiring․ Carefully verify that each wire is connected to the correct terminal, referencing both the thermostat’s wiring diagram and the documentation for your existing HVAC system․ Misplaced wires can cause system malfunctions or damage․
If the thermostat doesn’t connect to Wi-Fi, ensure your network is functioning correctly and that you’ve entered the correct password․ Also, confirm the thermostat is within range of your Wi-Fi router․
Finally, if the system doesn’t respond to thermostat commands, re-enter Contractor Mode to verify system settings and cycle rates․ If problems persist, consult a qualified HVAC technician․
Understanding the UWP Mounting System (ISU)
The Honeywell Pro Series utilizes a Universal Wall Plate (UWP) mounting system, often referred to as the Installer Set Up (ISU)․ This system is designed to simplify installation and accommodate a wide range of existing wall configurations and wiring setups․
The UWP consists of a base plate and an optional cover plate․ The base plate mounts directly to the wall or existing electrical box, providing a secure foundation for the thermostat․ The ISU options allow for flexible wiring connections, ensuring compatibility with various HVAC systems․
Proper leveling of the UWP is crucial for a professional-looking installation․ Use a level during mounting to ensure the thermostat sits straight on the wall․ The UWP also facilitates easy wire access and organization, streamlining the wiring process․
The ISU is particularly useful when replacing older thermostats, as it can often cover imperfections in the existing wall․ It provides a clean and stable mounting point for the Honeywell Pro Series thermostat, contributing to a seamless integration with your home’s décor․
Filter Replacement Information
Maintaining a clean air filter is vital for the optimal performance and longevity of your HVAC system, and the Honeywell Pro Series thermostat doesn’t directly handle filter replacement, but monitors system health․ While the thermostat itself doesn’t require filter changes, it can be programmed to remind you when it’s time to replace your HVAC system’s air filter․
The frequency of filter replacement depends on several factors, including the type of filter, the presence of pets, and air quality conditions․ Generally, a standard 1-inch filter should be replaced every 1-3 months․ Higher-efficiency filters may last longer, but require more frequent checks․
Consult your HVAC system’s manual for specific filter replacement instructions․ Typically, filters are located in the air handler or furnace․ Always turn off the power to the HVAC system before replacing the filter․ Ensure the new filter is the correct size and type for your system․
Regular filter replacement improves air quality, reduces energy consumption, and prevents strain on your HVAC components․ The Honeywell Home app may offer features to track filter life and send reminders, helping you stay on top of this important maintenance task;