

True Fridge Manual: A Comprehensive Guide
This comprehensive manual provides essential guidance for True refrigeration equipment, offering troubleshooting tips and maintenance schedules for optimal performance and longevity.
It details problems like voltage issues, capacitor failures, and cleaning procedures, ensuring your cooler operates efficiently. Refer to the manual for door replacement instructions.
Understanding Your True Refrigerator
True refrigerators are renowned for their robust construction and reliable performance, particularly within commercial settings, but understanding their core functionalities is crucial for maximizing their lifespan and efficiency. These units employ a sophisticated refrigeration cycle, utilizing a compressor, condenser, evaporator, and refrigerant to maintain precise temperature control.
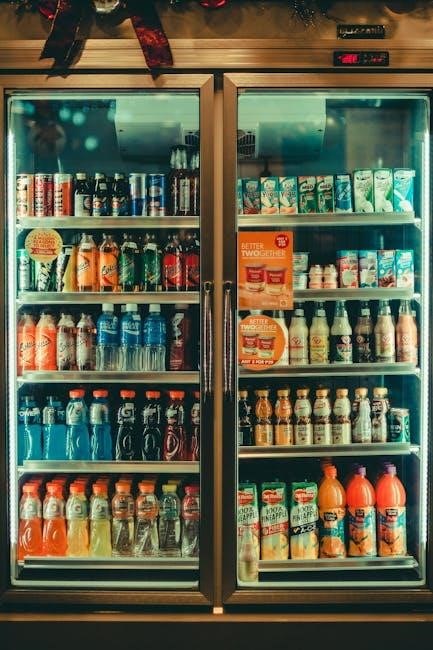
Unlike standard household refrigerators, True models often feature a self-contained system, meaning all components are housed within the unit itself. Proper ventilation is paramount, as restricted airflow can lead to overheating and reduced cooling capacity. Familiarizing yourself with the specific features of your model – whether it’s a reach-in, walk-in, or display case – is the first step towards effective operation and troubleshooting.

Regular maintenance, as outlined in this manual, is key to preventing common problems and ensuring consistent performance.
Model Identification and Serial Numbers
Locating your True refrigerator’s model and serial number is essential for accessing specific maintenance information, warranty claims, and ordering replacement parts. These identifiers are typically found on a data plate affixed to the unit. Commonly, this plate is located inside the cabinet, often on the left or right side wall, or sometimes on the back of the unit.
The model number designates the specific configuration of your refrigerator – size, features, and intended application. The serial number, a unique identifier, provides manufacturing date and production details. When contacting True Refrigeration customer support or ordering parts, always have both numbers readily available.
Accurate identification ensures you receive the correct manuals, troubleshooting guidance, and components for your particular True appliance. Keep a record of these numbers in a safe place for future reference.
Safety Precautions
Prioritizing safety is paramount when installing, operating, and maintaining your True refrigerator. Always disconnect the unit from the power supply before performing any maintenance or troubleshooting procedures. Avoid using extension cords, and ensure proper grounding to prevent electrical shock.
Do not attempt to repair electrical components unless you are a qualified technician. Improper repairs can create hazards. Keep flammable materials away from the refrigerator and condenser coils. Regularly inspect the power cord for damage, and replace it if necessary.
Never store explosive substances inside the unit. Ensure adequate ventilation around the refrigerator to prevent overheating. Follow all local electrical codes and regulations. Refer to the complete manual for detailed safety guidelines and warnings.

Installation and Setup
Proper installation ensures optimal performance. Unpack carefully, inspect for damage, and adhere to ventilation guidelines. Follow electrical connection instructions for safe operation.
Unpacking and Initial Inspection
Upon delivery, thoroughly inspect the True refrigerator for any visible signs of damage incurred during transit. Carefully unpack the unit, retaining all original packaging materials until you are completely satisfied with the condition of the appliance.
Check for dents, scratches, or other cosmetic imperfections. More importantly, inspect the refrigerant lines and electrical components for any signs of compromise.
Verify that all included accessories, such as shelves, drawers, and door gaskets, are present and undamaged. Document any discrepancies or damage immediately with the delivery carrier and contact True Refrigeration support. A detailed initial inspection prevents potential issues and ensures a smooth setup process.
Confirm the voltage matches your electrical supply.
Proper Ventilation Requirements
Maintaining adequate ventilation is crucial for the efficient operation and longevity of your True refrigerator. Insufficient airflow can lead to overheating, increased energy consumption, and reduced cooling performance.
Ensure there is ample space around the unit – typically at least 6 inches on all sides and the top – to allow for proper air circulation. Avoid obstructing the condenser coils with debris or placing the refrigerator in a confined space.
The surrounding ambient temperature should also be within the manufacturer’s specified range. Proper ventilation dissipates heat effectively, preventing component failure and ensuring consistent temperature control. Ignoring these requirements can void your warranty.
Regularly check for airflow obstructions.
Electrical Connection Guidelines
Proper electrical connection is paramount for the safe and reliable operation of your True refrigerator. Always ensure the voltage and frequency supplied match the specifications listed on the unit’s nameplate.
The refrigerator should be connected to a dedicated, grounded electrical circuit, protected by a properly sized circuit breaker or fuse. Avoid using extension cords or multi-outlet adapters, as they can cause voltage drops and potential fire hazards.
Installation should be performed by a qualified electrician, adhering to all local and national electrical codes. Verify wiring is correct to prevent damage. Low voltage can cause operational issues. Inspect connections regularly for tightness and corrosion.
Never attempt repairs yourself.

Daily Operation and Maintenance
Consistent daily checks, including temperature monitoring and door seal inspections, are vital for optimal True fridge performance and preventing potential problems.
Temperature Control Settings
Maintaining precise temperature control is crucial for food safety and True refrigerator efficiency. The thermostat dictates internal temperatures, so ensure it hasn’t been accidentally adjusted or switched off during routine operation. Proper settings vary based on the model and intended use – refrigeration versus freezer compartments.

Generally, refrigerators should be kept between 34°F and 40°F (1°C and 4°C), while freezers operate best at 0°F (-18°C). Regularly verify temperatures with a calibrated thermometer. If inconsistencies arise, avoid drastic adjustments; small increments are recommended. Troubleshooting temperature fluctuations often begins with confirming the thermostat’s functionality and ensuring adequate airflow isn’t obstructed by overpacking or blocked vents. Consistent monitoring prevents spoilage and maximizes energy efficiency.
Proper Food Storage Techniques
Effective food storage within your True refrigerator maximizes freshness and minimizes waste. Utilize airtight containers to prevent odor transfer and maintain humidity levels. Raw meats should always be stored on the lowest shelf to avoid cross-contamination. Dairy products benefit from consistent, cooler temperatures, ideally towards the middle shelves.
Fruits and vegetables thrive in crisper drawers, designed to regulate humidity. Avoid overcrowding, as this restricts airflow and can lead to uneven cooling. Regularly check expiration dates and practice FIFO (First In, First Out) rotation. Proper storage not only preserves food quality but also contributes to the overall efficiency of your refrigeration system, reducing strain and energy consumption.
Cleaning Procedures – Interior
Regular interior cleaning of your True refrigerator is crucial for hygiene and performance. Begin by disconnecting power and removing all food items. Shelves and drawers should be taken out and washed with warm, soapy water; rinse thoroughly and dry before replacing.
For the interior walls, use a mild detergent solution and a soft cloth. Avoid abrasive cleaners, as they can damage surfaces. Pay attention to spills and stains, addressing them promptly. Don’t forget to wipe down the door gaskets to maintain a tight seal. A clean interior promotes better airflow, reduces odors, and ensures food safety. Rinse all surfaces with clean water and dry completely before restocking.
Cleaning Procedures – Exterior & Condenser Coils
Maintaining a clean exterior enhances the appearance of your True refrigerator and contributes to its efficiency. Wipe down the exterior surfaces with a mild detergent and warm water, then dry with a soft cloth. Avoid harsh chemicals or abrasive cleaners.
Critically, regularly clean the condenser coils – often a cause of overheating. Disconnect power before cleaning. Use a vacuum cleaner with a brush attachment to remove dust and debris from the coils. Dirty coils restrict airflow, forcing the compressor to work harder. This cleaning should be performed at least twice a year, or more frequently in dusty environments. Ensure the area around the refrigerator allows for proper ventilation after cleaning.

Troubleshooting Common Issues
Common problems include cooling failures, freezing issues, frost buildup, unusual noises, and door seal leaks; this section offers solutions for quick and easy resolution.
Refrigerator Not Cooling
If your True refrigerator isn’t cooling, begin by checking the power supply to ensure it’s properly connected and receiving voltage. Incorrect wiring can also cause this issue, so verify all connections. A frequently encountered problem is a faulty start or run capacitor, which may be open or shorted, preventing the compressor from running effectively.
Inspect the thermostat setting; accidental adjustments or a turned-off thermostat will obviously halt cooling. Carefully examine the door gaskets for any damage or gaps, as air leaks compromise cooling efficiency; Dirty condenser coils are a common culprit, leading to overheating; cleaning them is crucial.
Finally, consider a potential relay failure, hindering the compressor’s operation. Thoroughly investigate these areas to diagnose and resolve the cooling problem efficiently, consulting the full manual for detailed instructions and diagrams.
Freezer Not Freezing
When a True freezer fails to freeze, initial checks should focus on the power supply and thermostat setting – ensure proper connection and the thermostat isn’t accidentally switched off or incorrectly adjusted. A low voltage supply can significantly impact performance, so verify adequate power delivery.
Inspect the door seals meticulously for any leaks or damage; compromised seals allow warm air to enter, hindering freezing. Dirty condenser coils are a common cause, leading to overheating and reduced cooling capacity – regular cleaning is vital. Examine the start or run capacitor; a faulty component can prevent the compressor from operating correctly.
Finally, consider a potential relay failure. Thoroughly investigate these areas, referencing the complete manual for detailed troubleshooting steps and diagrams to restore freezing functionality.
Excessive Frost Buildup
Excessive frost accumulation within your True refrigerator or freezer often signals underlying issues requiring attention. A primary culprit is frequently opening the doors, allowing warm, moist air to enter and condense as frost. However, consistently checking the door seals for proper closure and damage is crucial; compromised seals lead to air leaks.
Dirty condenser coils contribute significantly to this problem, hindering efficient heat exchange and promoting frost formation. Regularly cleaning these coils is essential preventative maintenance. Inspect the defrost system; a malfunctioning defrost heater, timer, or thermostat can prevent automatic frost removal.
Ensure proper ventilation around the unit, as restricted airflow exacerbates frost buildup. Refer to the full manual for detailed diagrams and troubleshooting steps to address these concerns effectively.
Unusual Noises
Unusual noises emanating from your True refrigerator can indicate a variety of potential problems. A rattling sound might suggest loose components, such as the condenser fan blade or shelving. Humming noises are often normal, stemming from the compressor, but excessive or irregular humming warrants investigation.
Clicking sounds could point to a failing start relay or a thermostat issue. A buzzing noise may indicate a problem with the condenser fan motor or the evaporator fan motor. Inspect these components for obstructions or damage.
If you hear gurgling or bubbling sounds, it could be related to the refrigerant flow; this requires professional attention. Always consult the complete manual for detailed diagrams and safety precautions before attempting any repairs.
Door Seal Problems & Air Leaks
Door seal problems and resulting air leaks significantly compromise your True refrigerator’s efficiency and food preservation capabilities. Regularly inspect the door gaskets for cracks, tears, or gaps. A simple test involves closing the door on a piece of paper; if you can easily pull it out, the seal is likely compromised.
Dirty gaskets can also prevent a proper seal, so clean them regularly with mild soap and water. Damaged gaskets should be replaced promptly to maintain consistent temperatures. Air leaks force the compressor to work harder, increasing energy consumption and potentially leading to component failure.
Ensure the doors are closing completely and are not obstructed. Refer to the component replacement section of this manual for gasket replacement instructions.

Advanced Troubleshooting
Advanced troubleshooting requires electrical checks, examining voltage, capacitors, relays, and thermostats for malfunctions. Professional assistance is recommended for these complex repairs and safety.
Voltage Issues and Electrical Checks
Addressing voltage issues is crucial for True refrigeration troubleshooting. Begin by verifying the power supply, ensuring it matches the refrigerator’s requirements. Utilize a multimeter to check the voltage at the outlet and at the unit itself, looking for discrepancies.

Incorrect wiring can also cause problems; carefully inspect all connections. A low voltage supply can prevent the compressor from starting or cause inefficient operation. Furthermore, examine the wiring for any signs of damage, such as fraying or loose connections.
Electrical checks should be performed with the unit disconnected from power for safety. Always consult a qualified technician if you are uncomfortable performing these tests, as improper handling can be dangerous. Prioritize safety when dealing with electrical components.
Start/Run Capacitor Problems
Start and run capacitors are vital for the compressor’s operation in True refrigeration units. A failing capacitor is a common cause of compressor issues, preventing it from starting or running efficiently. Symptoms include humming noises or the compressor attempting to start but failing.
Troubleshooting involves visually inspecting the capacitor for bulging or leaking. Use a multimeter with capacitance testing capabilities to verify the capacitor’s value matches the specification on the unit’s label. An open or shorted capacitor must be replaced.
Replacing a capacitor requires discharging it first to avoid electrical shock – a crucial safety step. Always use a capacitor rated for the correct voltage and microfarad (µF) value. Incorrect replacement can damage the compressor.
Relay Failures
Relay failures within a True refrigeration system often manifest as the compressor not starting, even if power is reaching the unit. The relay acts as a switch, activating the compressor, and a faulty relay interrupts this process. This is a frequently encountered problem during troubleshooting.
Diagnosing a relay failure involves testing for continuity using a multimeter. A lack of continuity indicates a failed relay. Visually inspect the relay for signs of burning or damage. Replacement is typically straightforward, but ensure the new relay matches the original’s specifications.
Incorrect relay replacement can lead to further damage. Always disconnect power before working on electrical components. A failing relay is often linked to voltage fluctuations or compressor overload, so address these underlying issues as well.
Thermostat Malfunctions
Thermostat malfunctions in True refrigeration units can cause inconsistent temperatures – either the refrigerator won’t cool, or it will run continuously. A faulty thermostat fails to accurately sense the internal temperature and regulate the compressor accordingly, leading to problems with food preservation.
Troubleshooting begins with verifying the thermostat setting; accidental adjustments are common. Use a multimeter to test the thermostat’s continuity at different temperature settings. A lack of continuity when it should be present, or vice versa, indicates a failure.
Replacing a thermostat requires disconnecting power and carefully noting the wiring configuration. Ensure the replacement thermostat is compatible with your True model. Proper calibration post-installation is crucial for accurate temperature control and efficient operation.

Component Replacement
This section details procedures for replacing parts like door gaskets, light bulbs, and condenser fan motors, ensuring proper True refrigeration function and efficiency.
Replacing Door Gaskets
Door gaskets are crucial for maintaining consistent temperatures and preventing energy loss in your True refrigerator. If you notice air leaks or damaged seals, replacement is necessary. Begin by carefully removing the old gasket, often held in place by a friction fit or retaining clips – gentle prying may be required.
Before installing the new gasket, thoroughly clean the door’s gasket channel to remove any debris or old adhesive residue. Ensure the new gasket is the correct size and type for your specific True model. Carefully press the new gasket into the channel, working your way around the entire door frame. Verify a tight, consistent seal by closing the door and checking for any gaps. A properly installed gasket will significantly improve cooling efficiency and reduce energy consumption, extending the life of your refrigeration unit.
Replacing Light Bulbs
Replacing light bulbs in your True refrigerator is a straightforward process, ensuring continued visibility inside the unit. Always disconnect the refrigerator from the power source before attempting any repairs, including bulb replacement, to prevent electrical shock. Locate the light bulb cover, typically found on the interior ceiling or side wall of the refrigerator compartment.
Remove the cover, often by gently unscrewing or releasing retaining clips. Carefully remove the old bulb, noting its type (incandescent, LED, etc.) to ensure you purchase a suitable replacement. Install the new bulb, avoiding direct contact with the glass. Reattach the light bulb cover, and then restore power to the refrigerator. If the new bulb doesn’t illuminate, double-check the bulb type and ensure it’s securely seated. A functioning light enhances usability and simplifies food identification.
Condenser Fan Motor Replacement
Replacing the condenser fan motor is crucial for maintaining proper cooling efficiency in your True refrigerator; Begin by disconnecting power to the unit. Locate the condenser coils, usually at the back or bottom of the refrigerator, and access the fan motor. Disconnect the electrical connections to the old motor, carefully noting their positions for reassembly.
Remove the mounting hardware securing the motor, and then detach the old motor. Install the new condenser fan motor, ensuring it’s properly aligned and secured with the original hardware. Reconnect the electrical wires, matching them to their original positions. Restore power and verify the fan is operating correctly. A faulty condenser fan motor can lead to overheating and reduced cooling performance, so prompt replacement is essential.
Preventative Maintenance Schedule
Regular maintenance, including monthly and annual checklists, ensures optimal True refrigeration performance. Professional service is recommended for complex issues and thorough system checks.
Monthly Maintenance Checklist
Consistent monthly checks are crucial for maintaining your True refrigerator’s efficiency and preventing costly repairs; Begin by visually inspecting door gaskets for any signs of damage, ensuring a tight seal to prevent air leaks and maintain consistent temperatures.
Clean the interior surfaces with a mild detergent and warm water, removing any spills or food debris promptly. Don’t forget to check and clean the condensate drain pan, preventing overflows and potential water damage.
Inspect the condenser coils for dust and debris accumulation; a dirty condenser can lead to overheating. Finally, verify that the temperature controls are functioning correctly and that the unit is maintaining the desired temperature settings. Document all observations for tracking purposes.
Annual Maintenance Checklist
A comprehensive annual inspection is vital for the long-term health of your True refrigerator. This should include a thorough cleaning of the condenser coils, potentially requiring professional assistance for optimal results, as dirty coils cause overheating.
Inspect all electrical connections, checking for loose wires or corrosion. Verify the functionality of the start and run capacitors, and relay switches, replacing them if necessary. Examine the thermostat for accurate temperature regulation.
Professionally assess the refrigerant levels and system performance. Lubricate any moving parts, such as fan motors, to ensure smooth operation. Finally, review the overall condition of the unit and schedule any necessary repairs or component replacements.
Professional Service Recommendations
For complex issues, or if you’re uncomfortable performing maintenance yourself, seeking professional assistance is crucial. True refrigeration systems require specialized knowledge for effective repairs, particularly concerning refrigerant handling and electrical components.
Annual professional inspections are recommended to assess overall system health, including refrigerant levels and compressor performance. Technicians can accurately diagnose and address voltage issues, capacitor problems, and relay failures.
Don’t attempt to repair sealed system components yourself; this requires certified technicians. Regular professional maintenance extends the lifespan of your unit, prevents costly breakdowns, and ensures optimal energy efficiency. Prioritize qualified service providers experienced with True equipment.